Hi there!
So it's winter here in New Mexico.
In case we forgot.

Obviously, that means I must refurbish furniture.
Nothing says fun like sanding and painting in cold weather in an unheated garage...
Actually, it did sound like fun. So that's what I did.
We bought a filing cabinet from friends who were moving. Here's the only before picture I have.

Glorious, isn't it?
Then I took my handy dandy sander to it. (80 grit first, folks)

Have I mentioned that a cordless sander with a pointed end is AMAZING?
No? Just trust me.
Your life will be changed.
Buzz it up, rough it up, let the pieces fly (with eye and mouth protection, I'm not crazy).
And voila!

 |
| The white spots are light shining through the window. I did NOT sand it down that far. |
 |
| Also had to repair a gouge that was there before. Love me some Wood Putty! |
 |
| Finished sanding for the day. |
After that, I decided to take a break and let that Putty dry a little. Lucky for me, we live in a VERY dry state. It took an hour.
Then you sand it down a little and wipe it down with a wet wipe.
Then I applied this puppy. The best primer.
 |
| Amazing coverage and great product. |
You let that sucker dry. I went back in and did another coat. Also letting it dry.
And by this time my hand and fingers were shaking involuntarily. So...

I wasn't driving anywhere. It was a treat. And it was Belgian.
Best of all, it reminded me of France and the bar I went to with my American friends now living in Exeter. Well worth it, I say.
Okay, so the paint wasn't quite to my liking that evening. Still a little tacky.
I let it dry overnight. It happens. You just roll with the punches.
 |
| But primer looks good. A little spotty, but that's why you paint. |
Here I am about to make a HUGE mistake.
 |
| Wrong sander. Too much power. |
It kind of stripped the primer off in one two inch by half inch swatch. Very not cool.
Switched back to the other sander.
Lesson 1: stick with one sander for a project. Even if the power is going down...you will find you still have enough juice left to finish it.
Anyway, I used 220 grit to get rid of the semi-rough bits. Wiped it down again and we were back in business.
 |
| Oh, here are my paint selections. |
I went with a satin finish. I wanted to do an eggshell, but it didn't come in my colors. Flat, Matte, Satin, or semi-gloss.
Satin seemed the best of the choices. Not super shiny but still wipeable should sticky fingers find the paint irresistible.
Rolled on a coat of Polar Bear with a foam roller and touched it up under the ledge and at the corners with a tiny roller.
Looked pretty, but had to let it dry before I could continue. Gave it another hour with the window open.
Lucky for me that day was a balmy 36 degrees outside with sunshine...


Yeah...took a little longer. Gave it two hours.
Came back in, perfect. No tacky feeling.
Rolled on a second coat.
Then Mr. K said I had to get out of the garage (and away from the fumes) and we went someplace.
I don't remember.
He was right about fumes.
But there was a beautiful sunset that night. I do remember that.


Came back two days later and decided to conquer my fears of adding color and get to it.
Had some help with the Mochi pup.
 |
| My helper |
Just kidding.
She came in to check on me and then high-tailed it (literally) out of the garage.
She hates paint fumes, even with the window open.
Since this was going to be a filing cabinet in Mr. K's office, I let him decide how he wanted it painted. He asked for a celtic knot. So I found some Tolkien-esque knots and let him choose.
Then I found some cool drawer pulls at Home Depot that had a little of the knot in them.
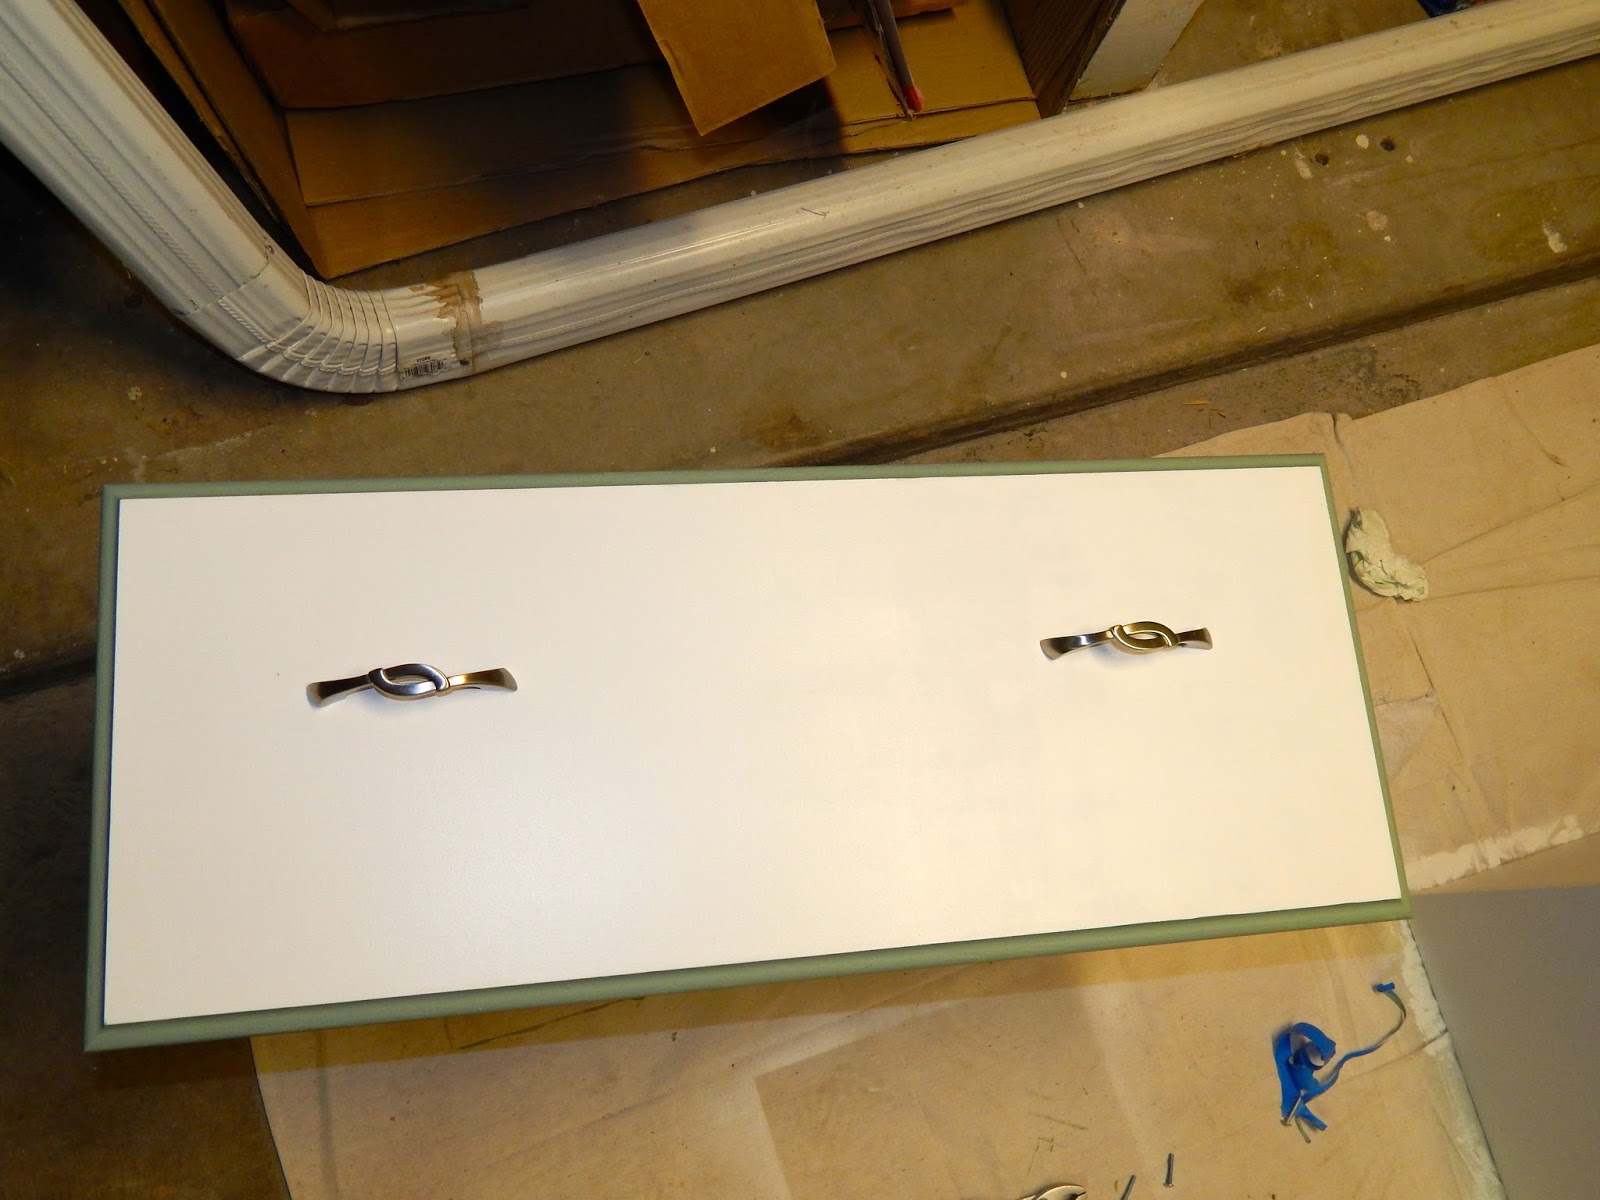 |
| Brushed nickel. All metal. Strong and functional with a bit of style. He loved them. |
Here's a closer look.

Well it was time to get to the painting.
I made my knot on tracing paper. (not the best idea, but you work with what you have)
I started painting with the baby roller on the cutouts and lo and behold, the paper started curling.
Bad news.
Stripped that off and free-handed the rest of the green, all the while trying to think of how to do it better.

Yes, you see what I ended up deciding to do. I traced the parts onto the cabinet. Then I'd paint over it.
Believe it or not, it worked.


And that, my friends is the end result.
But it's not assembled, you say.
You're absolutely right.
Mr. K and I moved the whole thing back to the office. Went to put in the drawers. And the left side tracks are slightly lower than the right. Mr. K said he'd fix that and then we could put it back together without damaging the work I did.
And so...it sits. Waiting it's adjustment. (that almost sounds like a punishment...)
The fun part is, Mr. K loves it. And it's a fun way to update an older looking piece of furniture.
$15 for the cabinet.
$30 for the paint.
$5 for new sand paper.
$8 for the handles.
$35 for the cordless sander (which I have been wanting for a while and now have for more projects so I consider it a worthy investment, and therefore I'm not really going to count this).
Total: $58 for a cabinet that he loves and will last a good while.
Or we could have bought a different one and then not have enjoyed the look as much.
Anyway, I'll take a picture when it's up and all assembled.
Until next time,
Bisous
No comments:
Post a Comment